Setting up
This lab uses the same files as the previous exercise. Go into the folder you created last time and check they are still there:
$ cd ~/Documents/sp/lab1
$ ls
If you don’t have the files, go back to the instructions for lab 1 and copy the files again.
Today we are going to use another speech analysis program to look at waveforms. This program is called Praat. Praat and Wavesurfer share many of the same functions, but sometimes one does particular things better than the other; Praat does a lot of things that Wavesurfer can’t.
Start Praat
$ praat
Praat will open two windows on the screen, one called praat objects and one called praat picture. You can immediately close the praat picture window: it is not needed for this exercise.
The main Praat window shows a list of loaded objects (currently an empty list), and a list of action buttons that can be used to manipulate objects.
To load a file into Praat click on the Open menu and select read from file. Load in the file kdt_001.wav. You should now have an object in the object list called Sound kdt_001. Click on the play button to play it.

Examine speech
If you want to view the waveform click the View & Edit button. This opens a window containing the speech and an f0 trace.
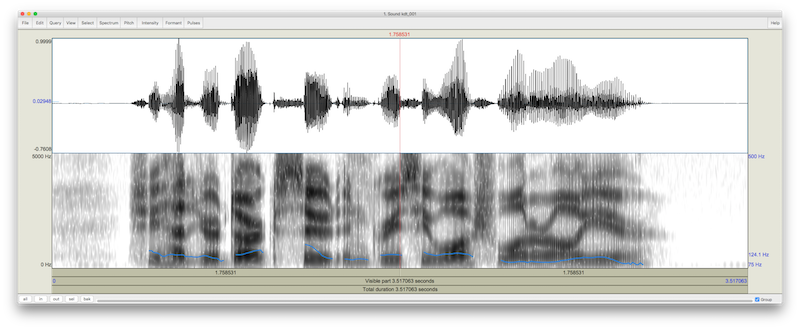
Work out how to zoom in and out, like you did with Wavesurfer. Notice that you can play selected parts of the waveform by dragging to select and then clicking on the ‘button’ that appears under the selection. You can add a spectrogram, by selecting the spectrum menu and clicking show spectrogram.
You can generate a spectrum of a portion of speech by first dragging to select some waveform and then clicking on the spectrum menu and selecting view spectral slice.
Praat lets you do some interesting things with the spectrum. You can select a range of frequencies by dragging the mouse over part of the spectral slice, and then play just those frequencies. Try it by selecting a large portion of the speech file, creating a spectral slice, selecting different frequency ranges and playing them.
Analyse various signals
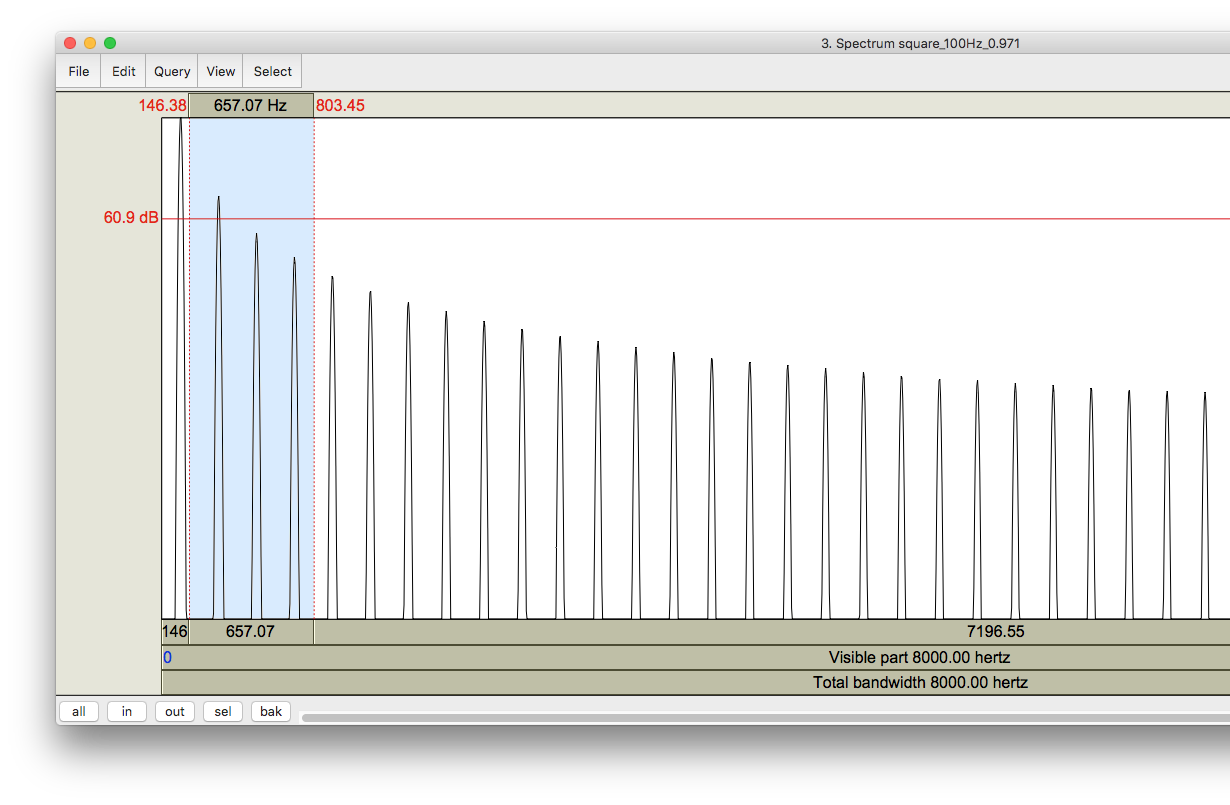
- Load one of the square waves, select a section from the middle of the waveform about 1 second in length, and generate a spectral slice of this portion.
You should see a spectrum showing the component frequencies for the waveform. Try playing individual peaks or groups of peaks. Compare the pitch and timbre of your selections.

Try the same thing, playing back just a range of frequencies, but this time use the sine or square waveforms:
- can you create a sound like a square wave, starting from a sine wave?
- can you create a sound like a sine wave, starting from a square wave?
- Load the file
sweep.wav.- Examine spectral slices at different points in the file.
- In the praat objects window select the sound sweep object and click on the
filterbutton and selectfilter one formant. In the box that opens, set a frequency of 2500Hz and a bandwidth of 300Hz, and click OK. - You should now have a new object in the list called
Sound sweep_filt. Compare the waveform and spectrum of this object to the original object.
- Try the above filtering process on the speech waveform, with filter frequencies in the typical range of speech formants, using narrow bandwidths of about 50Hz.